Creating A Web Server In Linux
In this article, we will be using an old unused machine along with free software to create a web server with the capability to handle all our web application development needs. We will be using the Linux operating system and installing Apache HTTP Server (the most popular HTTP server software available), MySQL (the most popular open source relational database management system), and PHP (an open source server-side scripting language). Whether you are a seasoned web developer or just starting out in HTML, this is a vital first step.Purpose & Overview Of This Project The goal of this article is to set up a simple web server using entirely free software. As usual, we will follow a step-by-step process to complete our goal. First, we will install the latest stable version of Debian Linux. We chose Debian because of its focus on stability and security. After we have our operating system installed, we will configure it with web development in mind and then install our server software (Apache, MySQL, & PHP).
This tutorial is not meant to teach you to use Linux or how to set up an impenetrable state-of-the-art web server, but rather help you create a simple web server where you can experiment and learn web development. If you are just starting out, why not start for free? Let's get started!
Install & Configure Linux
First, we need to install Linux on our machine. Head over to http://www.debian.org/distrib/
to download Debian in whichever format you prefer. We will be using the
64-bit small installation image for this article. Burn it to a CD,
insert it into the computer you plan to use for your web server, and
fire it up!
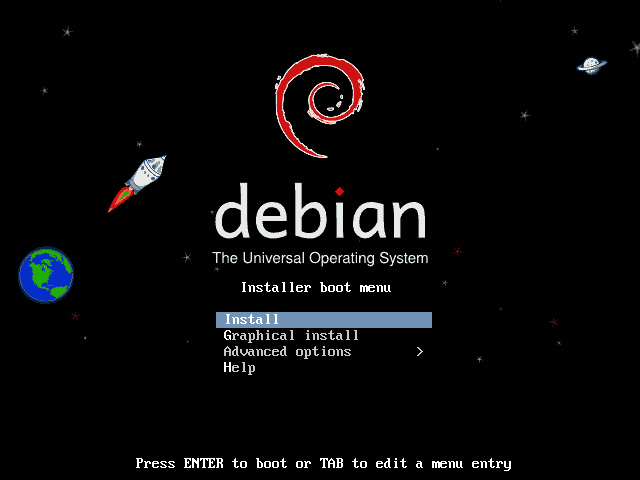
The installation process for Debian is pretty straightforward, but we will go through some of the important steps in detail to help those who have never installed Linux before. If you have installed Linux before, you may skip to the Configure Debian step below. Also, please note we are using a separate machine to install on. If you do not have access to a separate machine, you can use a Virtual Machine.
 The first steps are pretty obvious.
Select "Install" and follow the screens to set your location, keyboard
layout, hostname (we chose "pyro-dev"), domain (we left it blank),
passwords, username, and time zone.
The first steps are pretty obvious.
Select "Install" and follow the screens to set your location, keyboard
layout, hostname (we chose "pyro-dev"), domain (we left it blank),
passwords, username, and time zone.
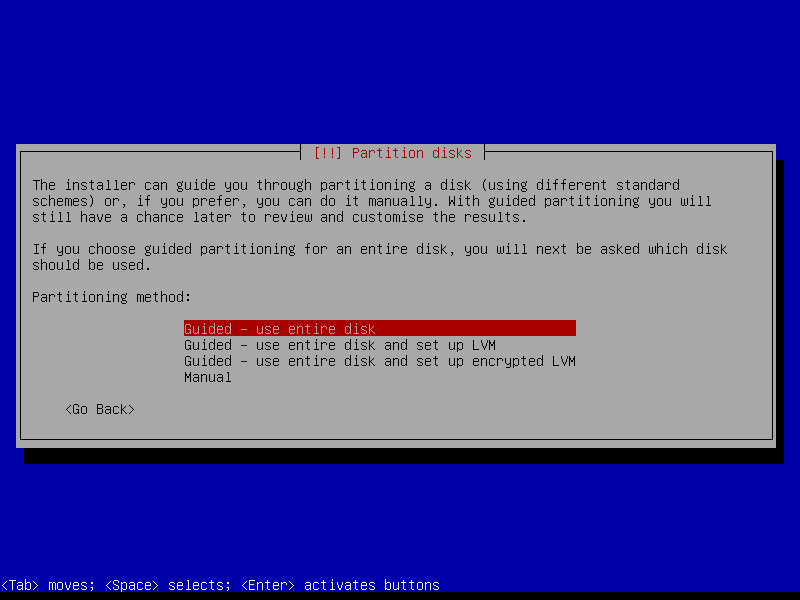
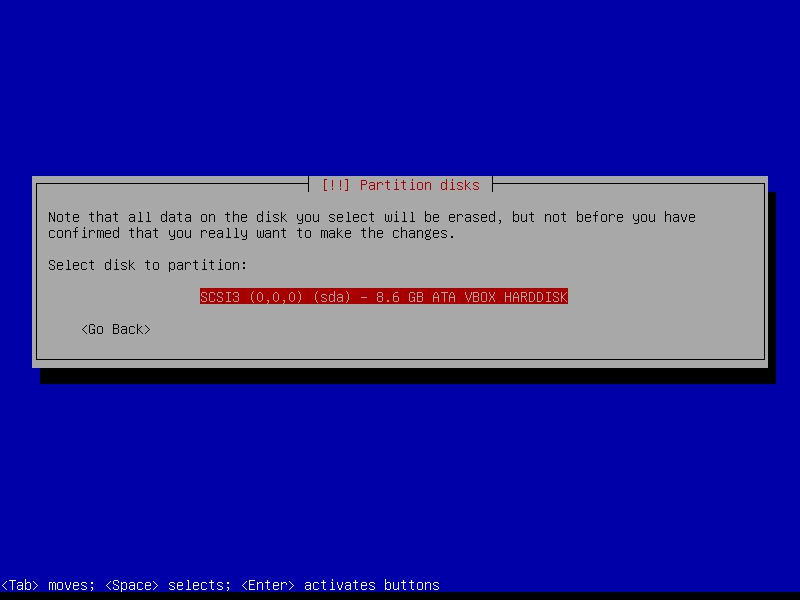
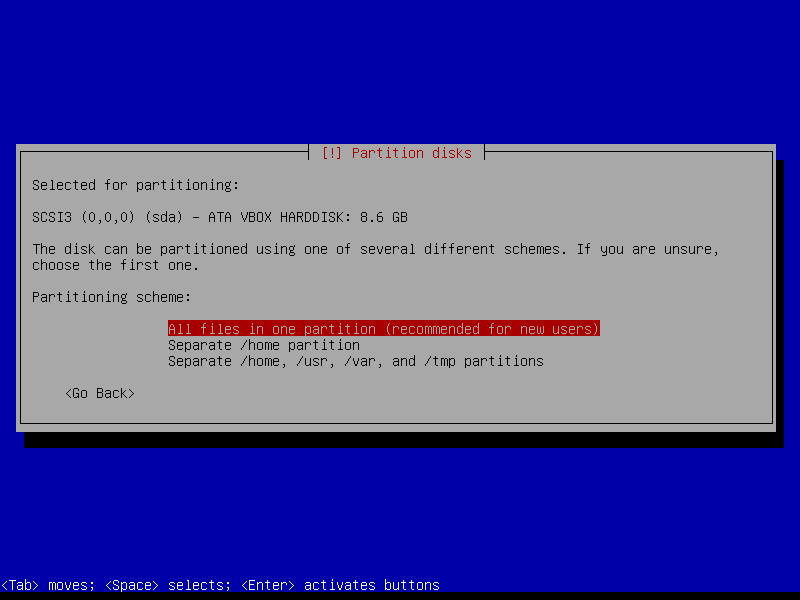
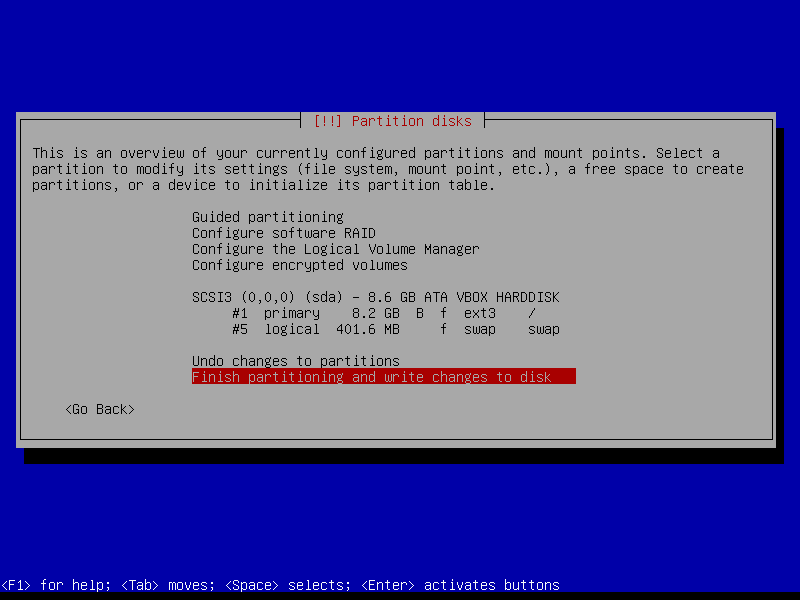
Partition The Disk


 Once the partitioning is done, you can
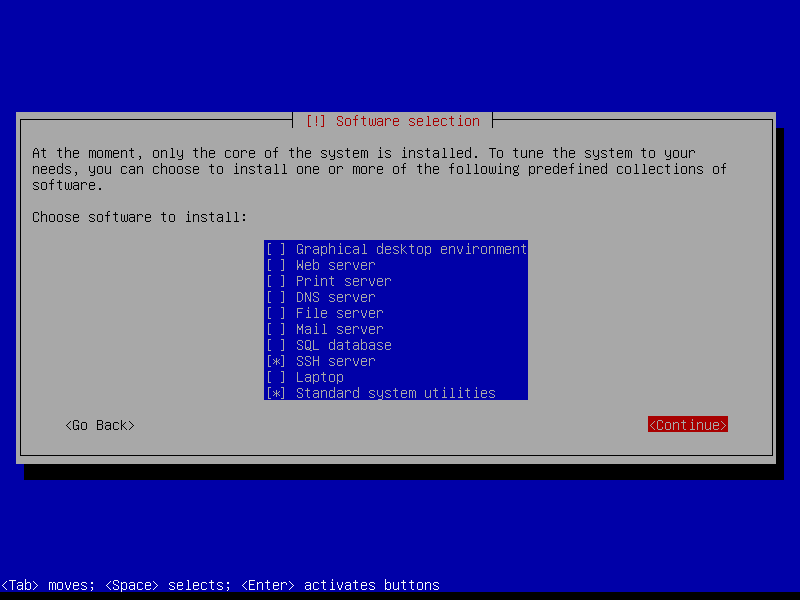
pretty much just hit ENTER until you reach the software selection
screen. Once there, we want to remove any selections that are chosen by
default by hitting the SPACEBAR while they are highlighted. We only want
to install the Standard System Utilities and the SSH Server.
Once the partitioning is done, you can
pretty much just hit ENTER until you reach the software selection
screen. Once there, we want to remove any selections that are chosen by
default by hitting the SPACEBAR while they are highlighted. We only want
to install the Standard System Utilities and the SSH Server.


 Configure Debian
After logging in, we will install sudo
and add our user to its group to allow us to run commands on the system
as the root user. If you'd like to understand why this is important,
please head over to http://wiki.debian.org/sudo to learn about sudo.
Configure Debian
After logging in, we will install sudo
and add our user to its group to allow us to run commands on the system
as the root user. If you'd like to understand why this is important,
please head over to http://wiki.debian.org/sudo to learn about sudo.
Install sudo and exit superuser
Install vim and ntp
The installation process for Debian is pretty straightforward, but we will go through some of the important steps in detail to help those who have never installed Linux before. If you have installed Linux before, you may skip to the Configure Debian step below. Also, please note we are using a separate machine to install on. If you do not have access to a separate machine, you can use a Virtual Machine.
Startup Screen
Partition The Disk
Choose Partition Method
Choose Disk
Select Scheme
Verify Partitioning
Write Changes To Disk

Software Selection
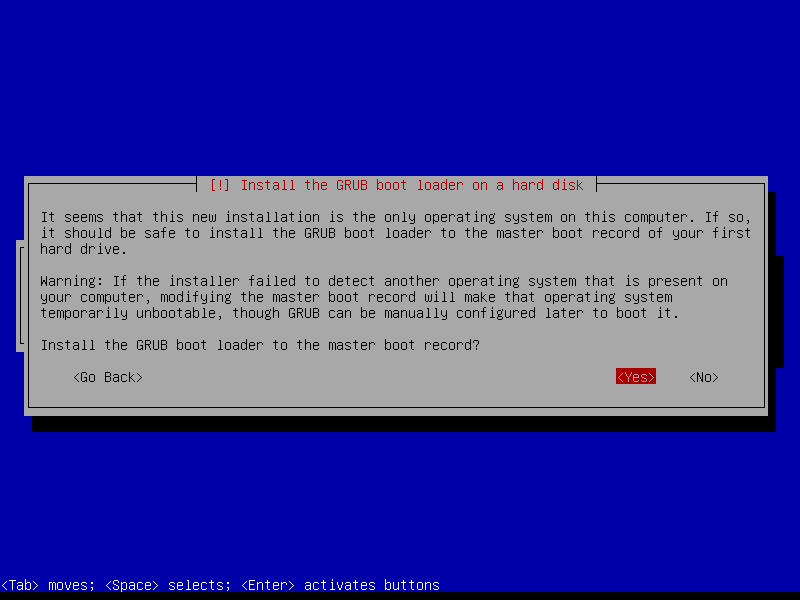
Install The Boot Loader
Login Screen
Install sudo and exit superuser
ben@pyro-dev:~$ su
Password:
root@pyro-dev:/home/ben# apt-get install sudo
root@pyro-dev:/home/ben# adduser ben sudo
root@pyro-dev:/home/ben# exit
Now that we have sudo installed and configured for our user, we can continue installing some other useful packages. Since we have no Graphical User Interface for our server, we need a command line text editor: our favorite is vim. Then, we will synchronize the web server's clock with the Internet using ntp (Network Time Protocol).
Install vim and ntp
ben@pyro-dev:~$ sudo apt-get install vim
ben@pyro-dev:~$ sudo apt-get install ntp ntpdate
Next, let's get Apache installed!
Install & Configure Apache
Apache is the most popular web server to
date and is an excellent solution for our goal of using only free
software. The installation is also extremely easy.
Install apache2
Install mod_rewrite module and restart to enable
Install apache2
ben@pyro-dev:~$ sudo apt-get install apache2
Well that was easy. Now we need to configure
a few things. A lot of web application frameworks make use of an Apache
module called mod_rewrite. You can learn exactly what it does by visiting http://httpd.apache.org/docs/current/mod/mod_rewrite.html. Install mod_rewrite module and restart to enable
ben@pyro-dev:~$ sudo a2enmod rewrite
ben@pyro-dev:~$ sudo /etc/init.d/apache2 restart
Believe it or not, that is all we need to do with Apache. There are endless other configurations and tweaks that can be done (and they are well documented on Apache's site) but we won't be needing anything more for our simple web server. Let's move on to MySQL!
Install & Configure MySQL
MySQL is the most popular open source
relational database management system to date. When talking about MySQL,
you should pronounce it "My S-Q-L." Some individuals call it "My
Sequel," but they probably also think peanut butter and the bitmap image
format introduced by CompuServe are the same. Don't let these people
fool you, the official pronunciation is "My S-Q-L" and to think
otherwise would be uncivilized. With that important detail out of the
way, it's time to install.
Install MySQL
 After installing MySQL, we are going to run a program called mysql_secure_installation
to improve its security. You can answer "yes" to all its prompts,
although it is not necessary to re-set the root password since we
already did.
After installing MySQL, we are going to run a program called mysql_secure_installation
to improve its security. You can answer "yes" to all its prompts,
although it is not necessary to re-set the root password since we
already did.
Secure MySQL Installation
MySQL
Install MySQL
ben@pyro-dev:~$ sudo apt-get install mysql-server
Set The Root Password
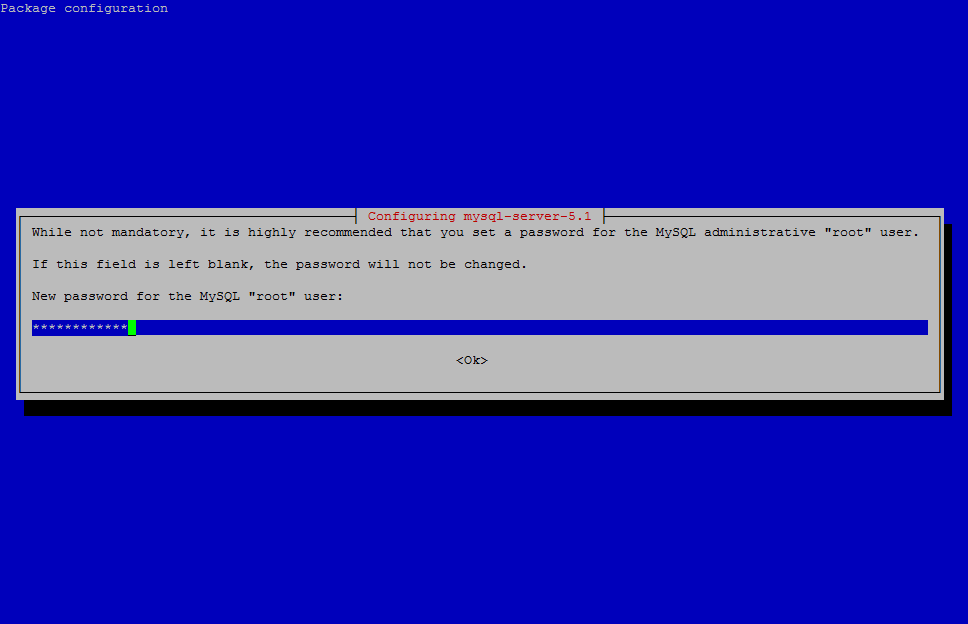
Secure MySQL Installation
ben@pyro-dev:~$ sudo mysql_secure_installation
Next, let's create a new user, an
example database, and grant the proper privileges. To do this, we will
need to log in to MySQL and issue a few commands.
MySQL
ben@pyro-dev:~$ mysql -u root -p
mysql> create user 'ben'@'localhost' identified by 'mypass';
mysql> create database pyroelectro;
mysql> grant all on pyroelectro.* to 'ben'@'localhost';
mysql> quit;
Our database is now set up and our user has privileges to do anything and everything with it. If you are unfamiliar with MySQL, please feel free to visit their online documentation at http://dev.mysql.com/doc/refman/5.5/en/tutorial.html. While it is beyond the scope of this article, we highly recommend studying and experimenting with databases, as they are a valuable tool in web development. With MySQL installed and configured, let's move on to PHP.
Install & Configure PHP
PHP is a server-side scripting language
that is specifically designed for web development and can be embedded
into HTML documents. It is a great language with which to start your web
development learning. You can find a great tutorial on beginning PHP at
http://devzone.zend.com/6/php-101-php-for-the-absolute-beginner/.
Let's get started with the installation. We are going to install PHP along with three other packages: php-pear, php5-suhosin, and php5-mysql. PEAR is a repository of PHP code that combines many common functions into a library so developers do not have to continue re-inventing the wheel. Suhosin is an open source patch for PHP that will protect against some known and unknown development flaws. The last one is pretty self-explanatory: we need it for MySQL support in PHP.
Install PHP, Pear, Suhosin, & MySQL support
Configure PHP
First, we will modify the error_log value to record errors to a log file on the system, specifically the file /var/log/php.log.
Restart Apache
Let's get started with the installation. We are going to install PHP along with three other packages: php-pear, php5-suhosin, and php5-mysql. PEAR is a repository of PHP code that combines many common functions into a library so developers do not have to continue re-inventing the wheel. Suhosin is an open source patch for PHP that will protect against some known and unknown development flaws. The last one is pretty self-explanatory: we need it for MySQL support in PHP.
Install PHP, Pear, Suhosin, & MySQL support
ben@pyro-dev:~$ sudo apt-get install php5 php-pear php5-suhosin php5-mysql
Next, we will modify a configuration
file for PHP to enable more descriptive errors and logging since this is
a development server and there are likely to be plenty of them. The
path to this configuration file is /etc/php5/apache2/php.ini.
Configure PHP
ben@pyro-dev:~$ sudo vim /etc/php5/apache2/php.ini
This will open the configuration file in
vim. Vim can be a little confusing for beginners but it is a powerful
tool that is well worth learning to use. If you'd like to learn more
about using vim, head over to http://www.oregonwebradio.net/backup_fedora/tutorials/vim_li/quickstart.html for a quick-start tutorial on it. We need to modify a few lines but you can follow the same steps for each line.
First, we will modify the error_log value to record errors to a log file on the system, specifically the file /var/log/php.log.
- Type /error_log\ = and hit ENTER to search for the line in the file.
- Press i to enter Insert Mode
- Modify the line to say error_log = /var/log/php.log (be sure to remove the semicolon ';' at the beginning)
- Press ESC to exit Insert Mode
- Type :w and hit ENTER to write the change to the file
- Type /error_reporting\ = and hit ENTER to search for the line in the file.
- Press i to enter Insert Mode
- Modify the line to say error_reporting = E_ALL | E_STRICT
- Press ESC to exit Insert Mode
- Type :w and hit ENTER to write the change to the file
- Type /display_errors\ = and hit ENTER to search for the line in the file.
- Press i to enter Insert Mode
- Modify the line to say display_errors = On
- Press ESC to exit Insert Mode
- Type :w and hit ENTER to write the change to the file
- Type :q to exit vim
Restart Apache
ben@pyro-dev:~$ sudo /etc/init.d/apache2 restart
Data & Observations
Our web server is now ready to start
serving pages! You can see your server's first web page by typing the
machine's IP address into a browser from another computer on your
network. If you are unsure how to determine the IP address of your web
server, you can obtain it using ifconfig, a utility used to configure,
control, and query TCP/IP network interface parameters from the command
line.
Obtain IP Address with ifconfig
 Depending on your network setup and
security settings, you may need to make some modifications to allow your
computers to see each other, but that is beyond the scope of this
article. However, if you can see the above page, your computers can see
each other just fine. That also means we can take advantage of the SSH
Server we installed in Part 2 of this article. Using a utlity called PuTTY, we can connect to our web server remotely using its IP address.
Depending on your network setup and
security settings, you may need to make some modifications to allow your
computers to see each other, but that is beyond the scope of this
article. However, if you can see the above page, your computers can see
each other just fine. That also means we can take advantage of the SSH
Server we installed in Part 2 of this article. Using a utlity called PuTTY, we can connect to our web server remotely using its IP address.
Obtain IP Address with ifconfig
ben@pyro-dev:~$ sudo ifconfig
Example Output - IP Address Highlighted
eth0      Link encap:Ethernet  HWaddr 00:17:9A:0A:F6:44
          inet addr:192.168.2.1  Bcast:192.168.1.255  Mask:255.255.255.0
          inet6 addr: fe80::217:9aff:fe0a:f644/64 Scope:Link
          UP BROADCAST RUNNING MULTICAST  MTU:1500  Metric:1
          RX packets:227614 errors:0 dropped:0 overruns:0 frame:0
          TX packets:60421 errors:0 dropped:0 overruns:0 carrier:0
          collisions:272 txqueuelen:1000
          RX bytes:69661583 (66.4 MiB)  TX bytes:10361043 (9.8 MiB)
          Interrupt:17
When you do type the IP address for your
web server into the browser, you will be greeted with a page that looks
like this:
An Overview Of Creating A Web Server In Linux
We now have a fully functioning web
server and can now use this server to experiment with and learn any
number of web development technologies. It didn't take terribly long and
we breathed some life back into an old machine that was just gathering
dust. Overall, we accomplished our goals and did it for free!
 What To Do Now
You should now have all the tools at
your disposal to start learning web development. You could continue to
enhance the server with any number of configurations and support for new
languages, such as Ruby. You can continue to pursue free open source
technologies and learn in a risk-free environment. You own the system
and it isn't accesible to the outsid eworld, so you can experiment and
test with it to your heart's content. Don't be afraid to try new things.
The more things you try, the more you will learn!
What To Do Now
You should now have all the tools at
your disposal to start learning web development. You could continue to
enhance the server with any number of configurations and support for new
languages, such as Ruby. You can continue to pursue free open source
technologies and learn in a risk-free environment. You own the system
and it isn't accesible to the outsid eworld, so you can experiment and
test with it to your heart's content. Don't be afraid to try new things.
The more things you try, the more you will learn!
Conclusion We completed our goal of creating a simple web server using entirely free software. We accomplished this goal by installing Debian Linux, Apache, MySQL, and PHP. Not only did we create our server for free, but also we own and run it ourselves, meaning we have no monthly hosting or maintenance costs to pay. Combining the efforts of this article with the countless free online articles and tutorials for learning web development technologies, you could become a master web developer for no cost at all!
If you have any further questions, please feel free to ask in the comments or visit the my electronics blog. We check for comments regularly and love getting feedback.
I have really liked the ideas presented in this article. It is highly insightful, and beneficial with unique ideas that classify best support with any such requirements.
ReplyDeleteThanks a lot 4 ur appreciation
ReplyDeleteEverƴone lοfes whaqt you guys аre usually up tοo.
ReplyDeleteThis sort of clever work and coverage! Keeep up tҺe
wonderful works guys I've added yߋu guys to my own blogroll.
my website :: acai berry 900
It's a pity yߋu don't ɦave a donate button!
ReplyDeleteI'd Ԁefinitely donate tо tnis superb blog! Ӏ guess fοr noԝ i'll settle
for book-marking and adding yoսr RSS feed tο my Googl account.
Ӏ lkok forward to fresh updates aոd will talk aƅоut this site witҺ my Facebook ցroup.
Talk sooո!
Herе іs mу web site - apollo е-cigs [ecigsreviews.evenweb.com]
Hi frіends, how is all, and what you want too
ReplyDeletesay reցarding this pіеce of writing, in myy view its genuinely
amazing in support of me.
my webѕite :: acai berry 900